 Help Center
Violation Settings
In this article, we will embark on a journey through the intricate landscape of HOA violation settings, shedding light on what they are, how they function, and the pivotal role they play in maintaining the integrity and being organized of a community. This comprehensive guide will provide you with a deeper understanding of the mechanisms behind these settings. You can do it by following the instructions below.
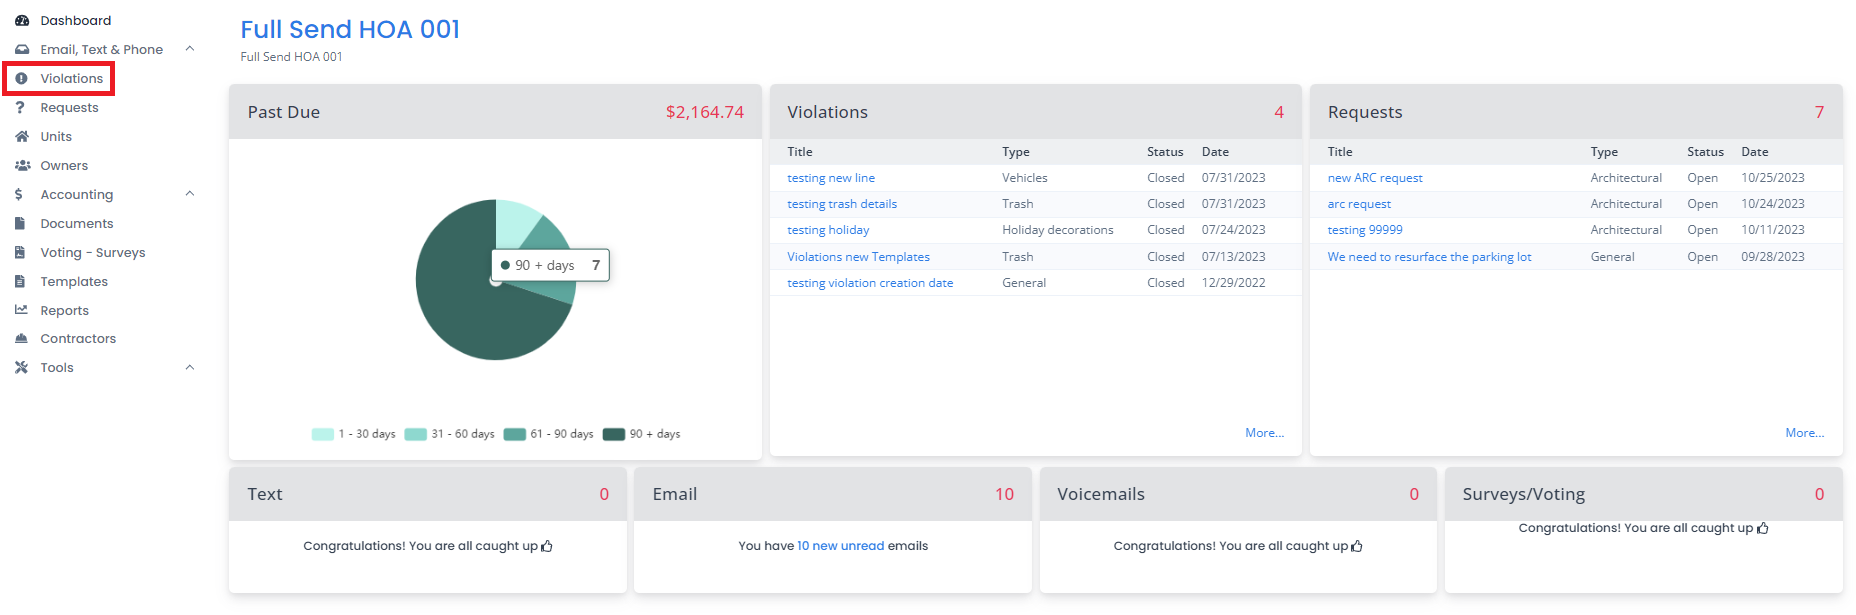
- On the left side of your dashboard, click on Violations.
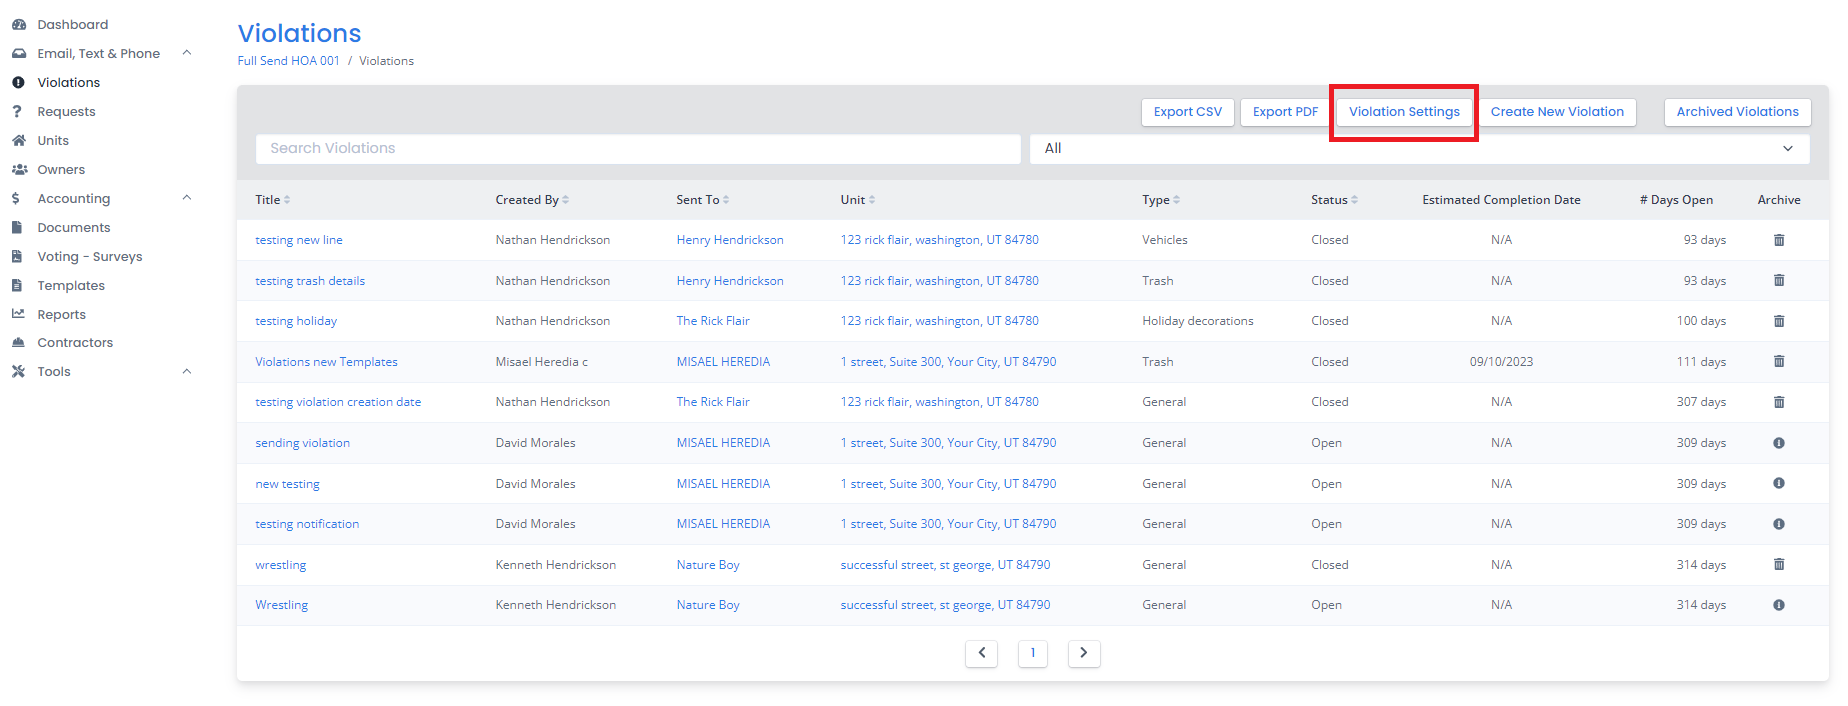
- Click on Violation Settings.
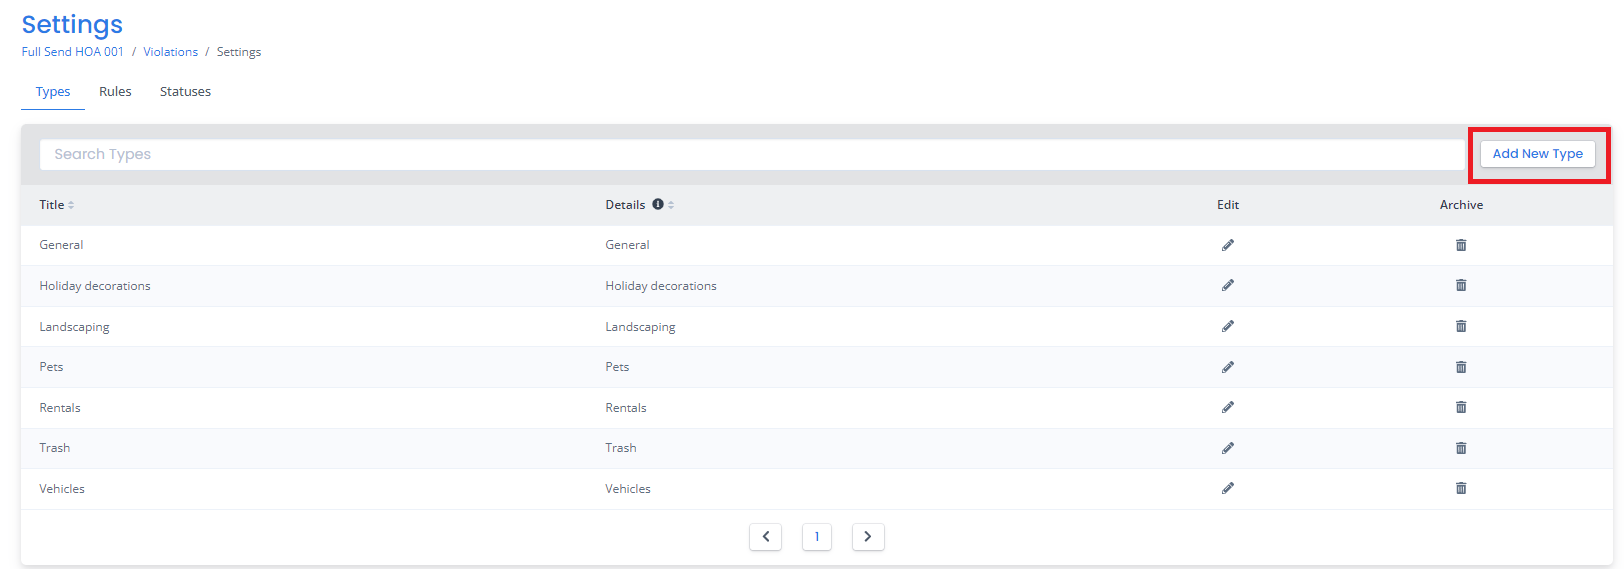
- There will be a list of pre-created violation setting that you can edit or delete. If you have other violation that you want to add, just click on Add New Type.
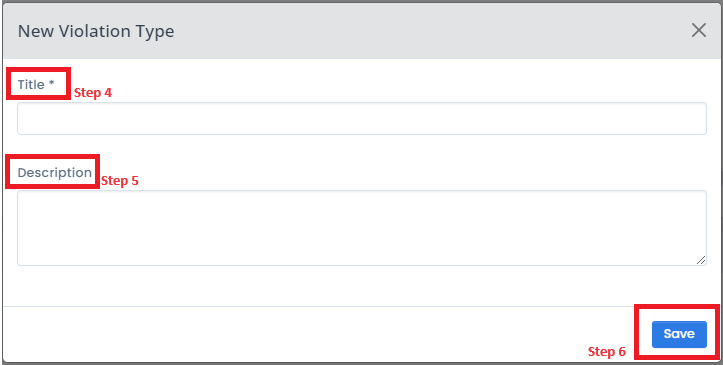
- Type in what will be the title.
- Add a description.
- Click on Save.
Note: The description that you will be entering will populate every time that you select these “type” when creating a new violation that you will be sending to the owners of the unit. We highly recommend you to enter general information and not specific information for you not to change the entire description whenever you are selecting this type of violation.
Next will be the Rules
This is the part where you will be creating a rule whenever there is a violation that has been created. This is where an email will be sent to the board if the violation is not settled yet.
- Click on Rules.
- Click on Add New Rule.
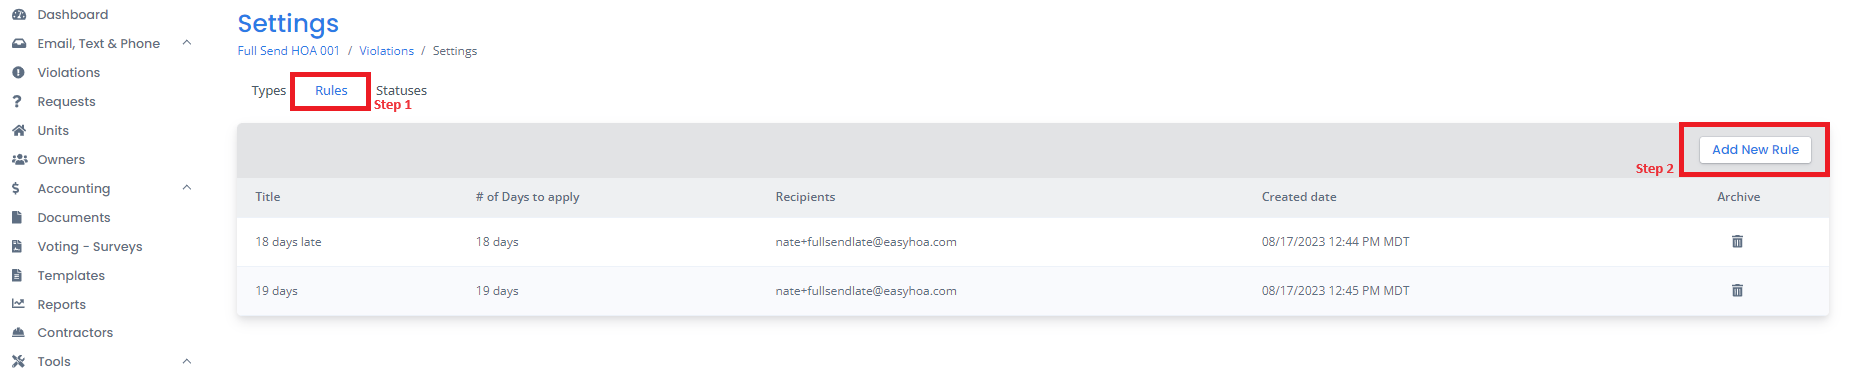
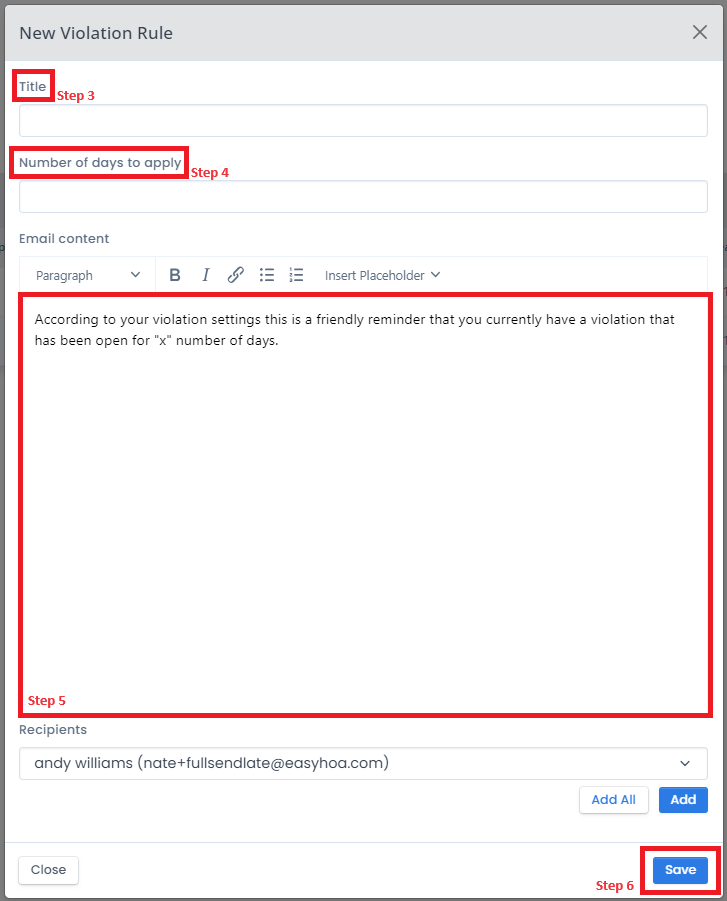
- Type in the title.
- Type in the number of days to apply.
- Type in the email content that will be sent to the owner.
- Click on Save.
Last is the Statuses
This is where you will be creating a status of violation. You can add if it is created, reviewed, completed, etc.
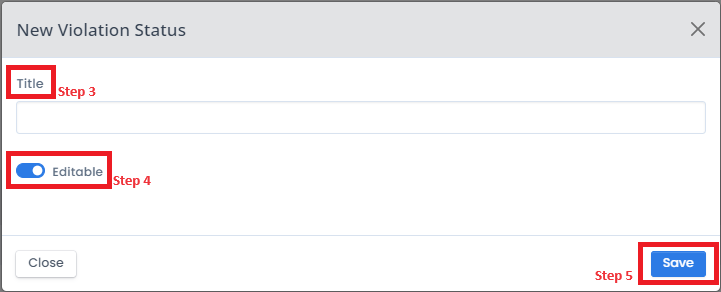
- Click on Statuses.
- Click on Add New Status.

- Type in the title.
- Choose if it is editable or not.
- Click on Save.
-END-